
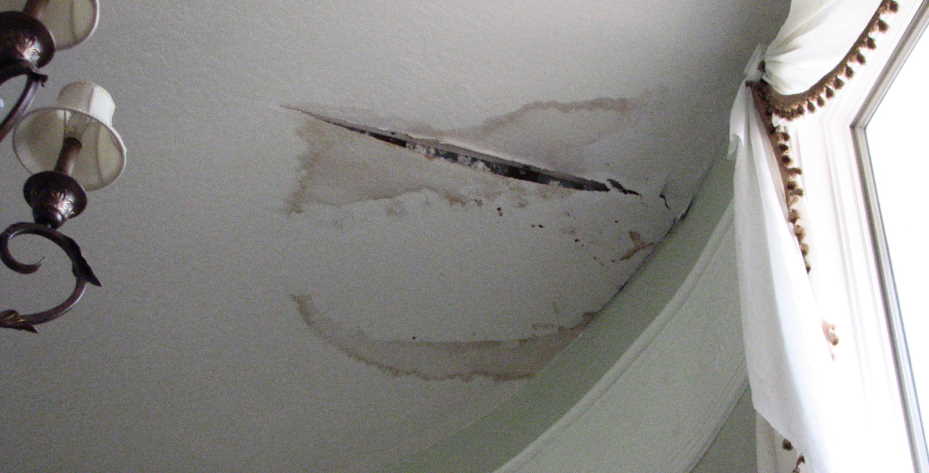
As a result of water damage or simply when the ceiling of your house or apartment is working, cracks may appear.
Nothing serious but useless to think of solving the problem with paint instead fix a textured ceiling hole. The cracks will come back! Here’s how to go about permanently repair textured ceiling.
Contrary to popular belief, repairing a crack in the ceiling is not difficult. Prior of starting, ensure you have a plaster ceiling. If so, here are the steps to take:
Clean the ceiling
In clear, it is a question of removing all that covers the crack (painting, coating …). To do this, use a spatula and do not hesitate to remove anything that does not hold. No quarter for scales! You have to work on a clean and wide support.
Scrape the crack
If it is narrow, you need to widen it with a scraper so that you can deposit a sufficient amount of coating on it. So do not hesitate to dig it, so that the bottom is wider than the edges. Clean all dust well with a brush.
Moisten the crack
Using a wet sponge, tap inside the crack and on the contours. The surface must not be too dry for the coating to adhere well.
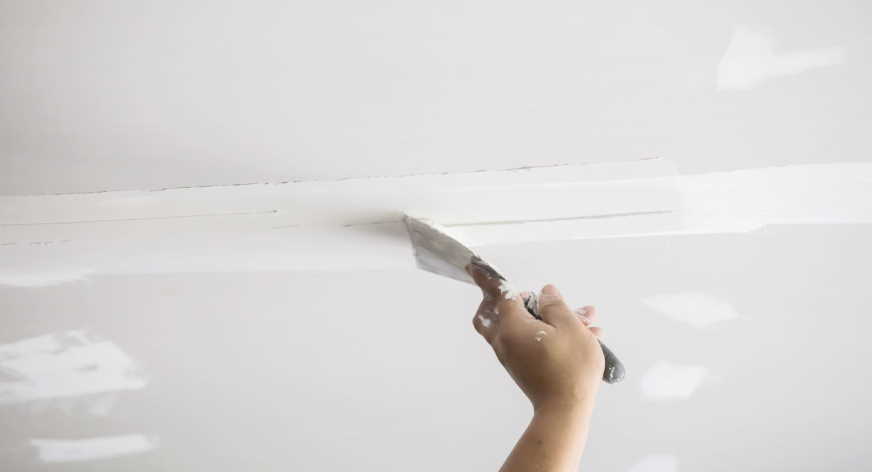
Coat
Finally, you arrive at the decisive stage. Place the coating on the tip of your coating knife (or spatula) and garnish with the crack.
On the product side, we advise you to choose a fast-drying filling plaster (drying time: about 2 hours, but it is better to read the advice for use, it all depends on the size of your crack).
Do not be afraid to have a little heavy hand, the crack must be well loaded. On the technical side, you must patch a hole in ceiling, then pass the spatula perpendicularly.
Make sure your surface is level. If there is a hollow, it will increase during drying! If necessary, clean your spatula with a cloth or water during the operation.
Let it dry and start the operation again
Allow it to dry for the necessary time and finalize the operation with a smoothing coating, which will give a truly smooth appearance and mask the last small defects before painting. This time, you will have to wait at least 12 hours before it is completely dry.
Painting
You have finished the most difficult! What you all have to do use to be repaint the surface, without hesitating to overflow onto the neighboring areas in order to unify the color. You might require applying a second coat of paint to avoid too much color. On this point, it remains your eye (or that of your spouse) the best judge!